Tuesday, January 25, 2011

Probiotics Part 2 - Lacto-Fermentation


The word 'probiotic' seems to be everywhere these days, but using microbes to transform food and enhance the available nutrients is not new; in fact it's as old as mankind itself. We start using probiotics in our diets almost from birth; breastfed babies have colonies of bacteria in their gut that break down the sugars in breast milk for easier absorption. As we age, the types of microbes in our intestines changes to adapt to our diet. Introducing microbes to food before we eat it helps to repopulate those colonies, as well as rendering food more digestible. Fermentation is probably the most widely used method of introducing probiotics in our diets; there are many methods of fermenting different substances and even more microbes at work in these methods. Like yogurt, the process behind things like sauerkraut and kimchi are dependent on lactic acid producing bacteria, hence why this process is often referred to as lacto-fermentation.

The most commonly known probiotic bacteria are the Lactobacillus family. Anything that starts with the initial L. followed by a barely pronounceble latin name is a member of this family. L. acidolphilus is probably the most well known; lately L casei has been getting some press as well. I'm sure you can figure out where L. kimchii is commonly found! This group of bacteria are commonly found in our guts (and in women they are found in healthy vaginas as well). The main reason we consider them beneficial is because their acid production makes their surroundings a little less inviting for some of the not so friendly bacteria- it's a competition thing and in a healthy gut the balance is constantly maintained. However scientists are beginning to examine the possibility that certain strains of this bacteria also produce additional health benefits which is why there's a recent commercial interest as well.

Another less commonly known probiotic bacteria is the Bifidobacterium family. Like the Lactobacilli they are found in yogurt and fermented foods. They are also found in the gut of healthy individuals, primarily infants; their numbers decline in the human body with age. Interestingly, bottle fed infants have much lower numbers as well. One species, B infantis is very successful at treating irritable bowel syndrome. Scientists are also looking at this group for it's positive effects on the immune system.

The best part of all of this is that it's very easy to ferment foods at home. Given the right conditions, fermentation by lactobacilli will take place naturally, because lactic acid bacteria occur normally on things like raw cabbage leaves where they grow. In traditional fermentation recipes salt is added to inhibit unwanted microbes like molds initially but allow the lactic acid bacteria to thrive. Once the bacteria have taken hold, the process is self promoting. As the desired bacteria eat up the naturally occurring sugars, they produce acid; the acid in turn makes the environment more hostile to unwanted pathogens therefore acting as a preservative. The benefits to humans are multilevel- a source of vitamins from the host medium (vegetables) along with other nutrients made more easy to digest, a replenishment of healthy bacteria in the gut, and additional components from fermentation process that we can't even identify yet!

There are many great books on fermentation and tons of online sources for recipes. Look for simple directions that don't include a lot of specialized equipment. Fermentation projects are great for winter months because you don't have to worry about conditions being too hot for your microbes and many of the ingredients are still readily available from local sources.

Some of my favourites:

www.wildfermentation.com
A great resource site and author of several books on fermentation.

Sauerkraut
Good clear instructions, with pictures, for making sauerkraut. He uses a special crock but mentions that you don't need one- a large jar with a wide mouth will work just as well and you can actually watch the bubbles appear- another byproduct of fermentation.

White kimchi
White kimchi uses same process but without the heat of traditional kimchi. It's a good place to start if you've never made kimchi before.

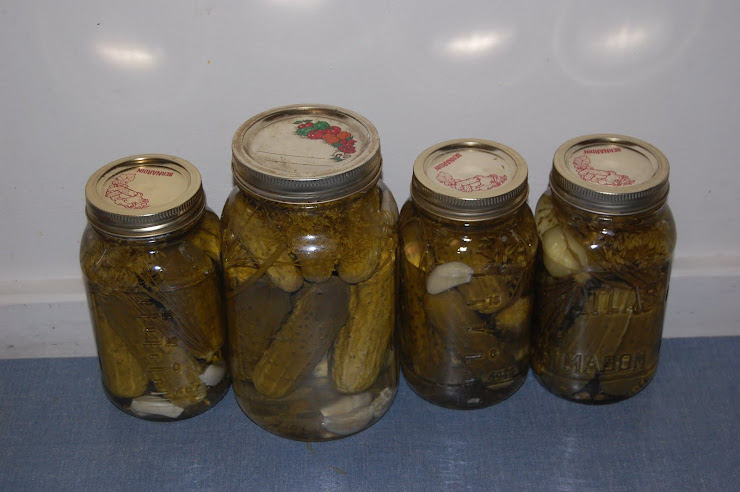
I made pickled grape leaves last summer using this recipe. For whey you can use the the liquid produced in yogurt making.

Happy fermenting!

Monday, January 24, 2011

Yogurt and Probiotics


There's been a lot of discussion online recently on making your own yogurt. Making yogurt at home is not new; my mom used to make it at home when we were little, way back in the 70's. You don't need much in the way of equipment or ingredients and it's pretty simple to make and fairly forgiving if you aren't an exact recipe type person, like me. A lot of online directions include a list of must-haves and must-dos which I find intimidating and sometimes absolutely wrong. I've been making yogurt for years and don't have or do most of those things and I've never had a failed batch. What you do have to keep in mind is that all yogurt is a live culture, at least at some point and it is possible to kill the organisms by mishandling; dead bacteria don't make good yogurt.

Things you need to know when making yogurt, the basics:

You need milk. Whole milk, skim milk, goat's milk, yak's milk, powdered milk (reconstituted of course), even soy milk (I've heard but never tried- apparently you need to add extra sugar). The only type of milk you should never try this with is ultra pasteurized because it has been heated to the point of destroying the helpful enzymes and you will end up with a pot of goo.

You need a starter culture. This is just a small amount of yogurt that contains a live culture (more on this later). Since all yogurts should contain live cultures in theory, you should be able to use any unsweetened yogurt but to be safe use a good quality plain yogurt that lists active bacterial cultures as one of the top ingredients and as little extra ingredients as possible. You need about 1 tablespoon of starter per two cups of milk. Once you've successfully made a batch you can use your own as a starter for future batches.

You need to heat the milk. The milk whichever type you use, needs to be heated to prepare it to accept the culture- this breaks down the inhibiting enzymes that are present. If you are using raw milk this will also kill off any potentially harmful organisms. You do NOT need to boil the milk, only scald it. Scalding milk means to heat it until the bubbles are just beginning to form so this is the only part that requires paying close attention. You do not want to burn your milk- it smells and tastes awful and as anyone who's ever done it knows, virtually impossible to get off the pot bottom. You can heat your milk on the stove using any kind of pot with a lid- use a double boiler if you like more control over how quickly it gets hot. Remove from heat as soon as you see new bubbles appearing around the sides of the pot, put a lid on it and set it aside to cool.

You need to cool the milk before adding the starter culture. This is the point where it's possible to kill the bacteria by mistake. The types of bacteria that make yogurt are thermophiles (heat loving) but even they can't survive at temperatures over 55oC (130o F). So you must let the milk cool to lukewarm before adding the culture. Don't cook your starter! If you are unsure what lukewarm should feel like, use a thermometer and don't add the starter until the milk is below 50 C (122 F) but still above 37oC (98oF). I just use my finger and if it feels warm but not hot, I add my starter directly to the milk. Stir well with a fork to evenly distribute the culture.

You need to keep your yogurt warm for 4 - 6 hours. Once you've added the culture to the milk, the bacteria are going to do their thing which is eat all the lactose (milk sugar) and produce lactic acid among other things. Also they are going to reproduce like crazy. You want this to happen so you need to give them the ideal conditions to do so and that means maintaining a minimum temperature of 38oC (100oF) but not higher than 50 C (122 F). There are a couple of low tech possibilities to do this. If you have a gas oven, the pilot light provides enough heat to maintain the proper temps so you just place your yogurt inside and check it in a few hours. If you don't have a gas oven you can get creative. Use a heating pad set on low and cover your pot with a heavy towel. Or put a hot water bottle with your yogurt, wrap both in a towel and put in cooler or inside your microwave, replacing the bottle with another if it cools too quickly. I've stuck pots of yogurt culture on my heated waterbed (yeah I'm old school), covered them with the duvet and left them for hours. As long as the heat source produces enough to keep it in the above temperature range your yogurt will be fine.

And that's pretty much it! In 4-5 hours the milk will begin to solidify and whey will appear. Once this has occurred you can stop the process at any time by refrigerating your yogurt. Refrigerating doesn't kill the culture, it just slows it down and the bacteria don't break down any more of the sugars. The longer you leave it at a higher temp, the more sour the yogurt gets so if you like it that way, leave it up to 8 hours or overnight. Congratulations, you've made yogurt!

Commercial yogurts as noted contain at least some bacterial culture although in many cases the yogurt is treated in a way that the culture is no longer active, or there are so many additives like gelatin, preservatives and artificial sweeteners and flavours that one wonders if there's actually any yogurt left. The recent trend to promote certain brands as having unique probiotic qualities makes me want to throw things at my television. Probiotics as defined by Food and Agriculture Organization of the United Nations, and the World Health Organization are "Live microorganisms which when administered in adequate amounts confer a health benefit on the host". This includes the lactic acid bacteria used to make yogurt as well as yeasts and other microbes. That means any yogurt that contains an active bacterial culture is probiotic, along with things like sauerkraut, kimchi, miso, and fermented pickles. The bacterial cultures found in yogurt can vary a bit in terms of species but they all have similar characteristics in that they are heat loving as mentioned above, and they consume sugars and produce acid.

In my previous life I studied about these kinds of things in school and the science nerd in me still thinks bacteria is fascinating. I also believe that everyone should have a basic knowledge of the types of bacteria that are helpful, as well as the ones that can potentially harm us, at least so I'm not the only one rolling my eyes at all the ads for antibacterial products. I hope to write a series of posts over the next while that go a little more in depth into preservation methods that utilize fermentation, and the science behind it.

Saturday, January 15, 2011

January Spice Rack Challenge: Rosemary


I had so much fun with the Can Jam last year that when I heard of the Spice Rack Challenge I signed up right away. And then promptly forgot about it until I read about it again on today's post by Tigress. Then I got in a panic and thought the deadline to post my recipe was today, which it it isn't ( that would be a different challenge - more on that later).

In any case I should probably mention that the Spice Rack Challenge is the brain child of "Mom" at Mother's Kitchen and, like it sounds, the idea is to cook with a specified herb or spice every month and blog about it. I regularly use a lot of different spices in my cooking and this sounded like a simple project to write about. The focus ingredient for this month is rosemary which I use lots of, and I overwinter my rosemary plant every year so I have a constant fresh source. Problem was since I hadn't been thinking of it, I didn't have the rest of the ingredients on hand for the recipe I'd planned on. So I did like any sensible person- I googled rosemary recipes! Lucky for me, one of the first recipes to pop up was a very simple dish that required only a couple ingredients, all of which I had. It's not a dish I would have normally chosen, mainly because of it's simplicity but I thought it would do well in a pinch. To my surprise it was absolutely fantastic and that fact that it turned out so well has given me the idea to make the Spice Rack Challenge even more challenging. I've decided that from here out I'm not going to fall back on my tried-and-true recipes for this project; instead I'm going to find a new (to me) recipe for each ingredient. After all if the point of the exercise is to learn something, it only makes sense to try new things.

Beet Roesti with Rosemary

From How to Cook Everything by Mark Bittman


Ingredients:
1 to 1-1/2 pounds beets
1 teaspoon coarsely chopped fresh rosemary
1 teaspoon salt
1/4 cup flour
2 Tablespoons butter


Preparation:
Trim the beets and grate them in a food processor or by hand. I think this recipe would be a great one for yellow beets as well. (I love yellow beets but as gorgeous as they are when fresh, yellow beets do not make a very attractive pickle.)

Begin preheating a medium to large non-stick skillet over medium heat. I used my cast iron pan but I had a little difficulty getting it out intact so maybe non stick is better if you use one.

Toss the grated beets in a bowl with the rosemary and salt, then add about half the flour; toss well, add the rest of the flour, then toss again.

Place the butter in the skillet and heat until it begins to turn brown. Scrape the beet mixture into the skillet, shape it into a nice circle, and press it down with a spatula. Turn the heat to medium-high and cook, shaking the pan occasionally, until the bottom of the beet cake is nicely crisp, 6 to 8 minutes.

Slide the cake out onto a plate, top with another plate, invert the two plates, and slide the cake back into the pan. Continue to cook, until the second side is browned. Cut into wedges and serve immediately.

It was amazingly delicious! Crispy outside just like potato roesti, it had a nutty, slightly sweet taste that worked very well with the rosemary. I served it with a dollup of sour cream on top and we had it for breakfast along with potato pancakes and poached eggs. I also tried a bit with some horseradish mayo and that was even more spectacular!


I think I'm going to like this challenge. If you think you might as well, it's not too late to sign up! You have until this Friday, January 21 to register.